Data Sources is where an account can manage where each Target originates from and resides in the Platform. There is no requirement to have more than one Data Source, and for many accounts one Data Source is all it needs.
If you have multiple signup forms across your website, you’re collecting contact info at trade shows, or even just through networking, this is a simple way to keep the Data Sources separated into focused categories.
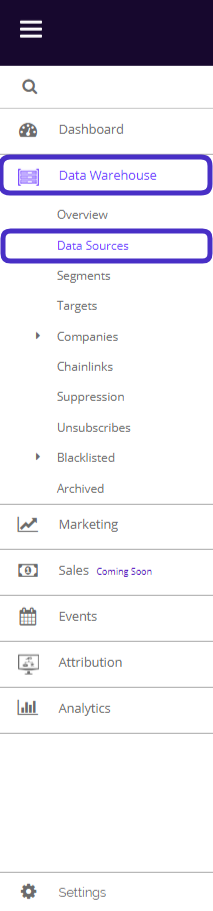
To access Data Sources, navigate to Data Warehouse > Data Sources.
This is what the Data Sources page looks like:
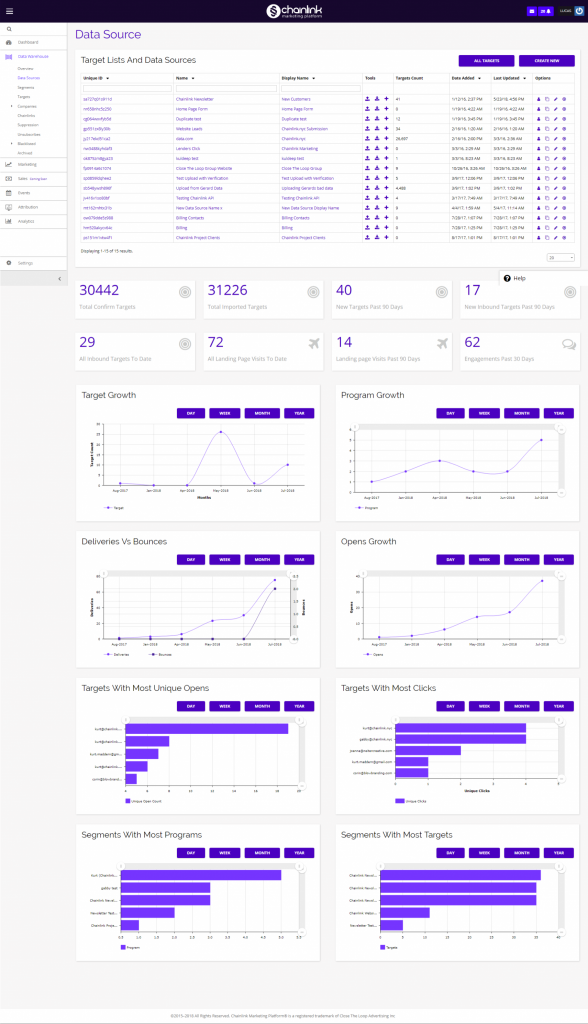
From this page, you can create a new Data Source, see an overview of all of your Data Sources, their overall performance, and quickly redirect to all of your Targets.
To quickly redirect from Data Sources to all of your Targets, simply click the All Targets button at the top of the dashboard.
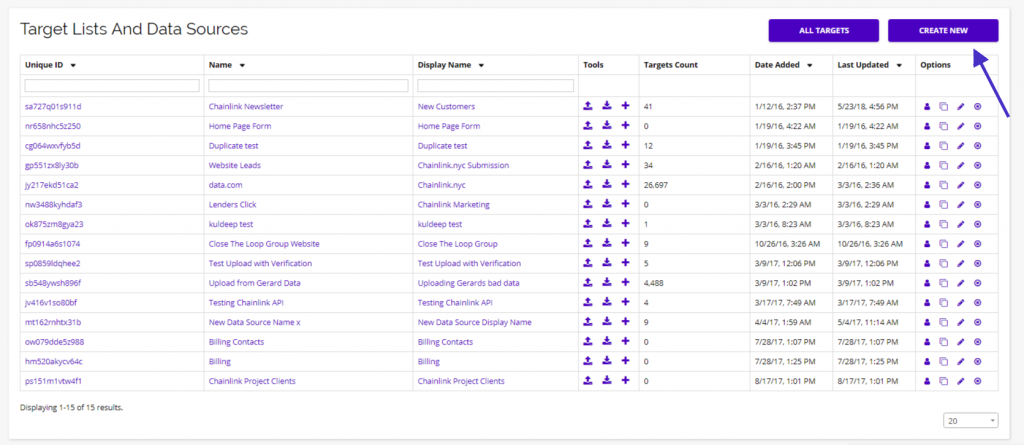
1. Target Lists And Data Sources
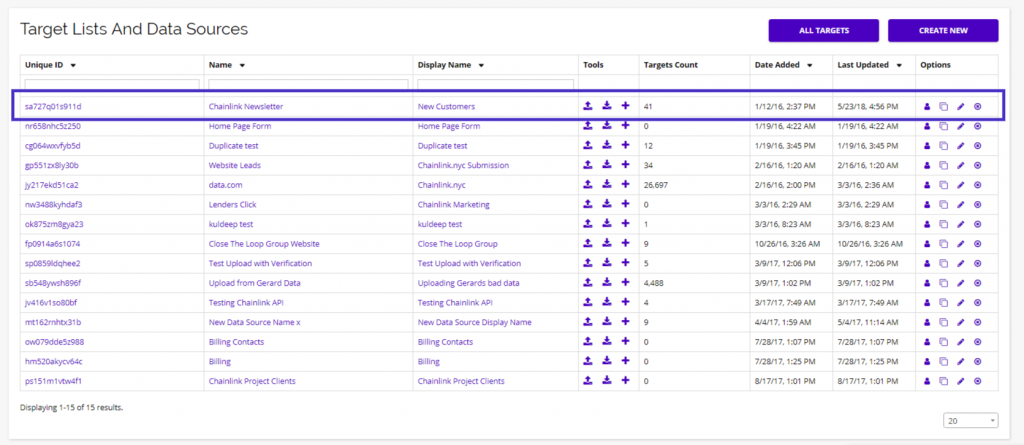
- At the top of the Data Source dashboard, you will find a list of your Data Sources along with the Targets count for each source.
- From here, you have a number of options. You can take a more in-depth look at any individual data source and the Targets within that source. You can also import, export, and add individual targets to a data source. You also have the ability to copy, edit, and delete any data sources.
- To take a closer look at the Targets in a data source, click on any of the purple links in the Name, or Display Name columns for the source you want to look at.
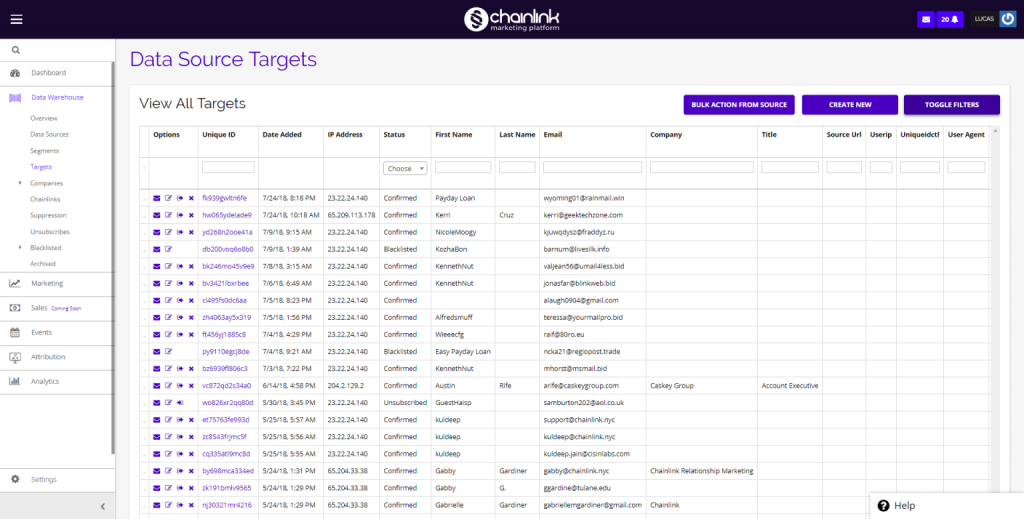
- From here, you will be brought to the individual Data Source’s page where you can see all of the Targets from that specific source. You also have the ability to apply any bulk actions to the list, add a new target to the data source, and toggle filters to view certain aspects of the data.
Bulk Actions
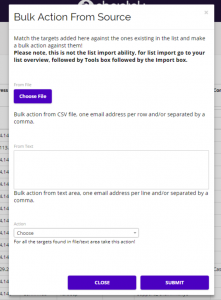
- When you click the Bulk Actions From Source button, a pop up form will appear where you can match the Targets added here against the ones existing in the list and take a bulk action against them.
- Make sure to follow the instructions and format your CSV file correctly to successfully apply any bulk actions.
- Bulk actions that you can take include, Subscribe, Unsubscribe, and Disable, and Delete.
- Example: Lets say you have a data source containing 1,000 Targets and you want to unsubscribe 500 of those Targets. Instead of individually unsubscribing 500 Targets, you can upload a CSV file containing those 500 Targets and choose unsubscribe from the action drop-down. If you don’t want to upload a CSV file, you can also enter the Targets’ email addresses in the text area. Click Submit when finished entering the information and the bulk action will be applied to the Targets specified in that Data Source.
- Note: This is not how you import a list of Targets to add to a Data Source. To import Targets to a Data Source, click the Import icon under the Tools column for the desired Data Source. See the Data Source Tools section below for more instructions.
Add New Target
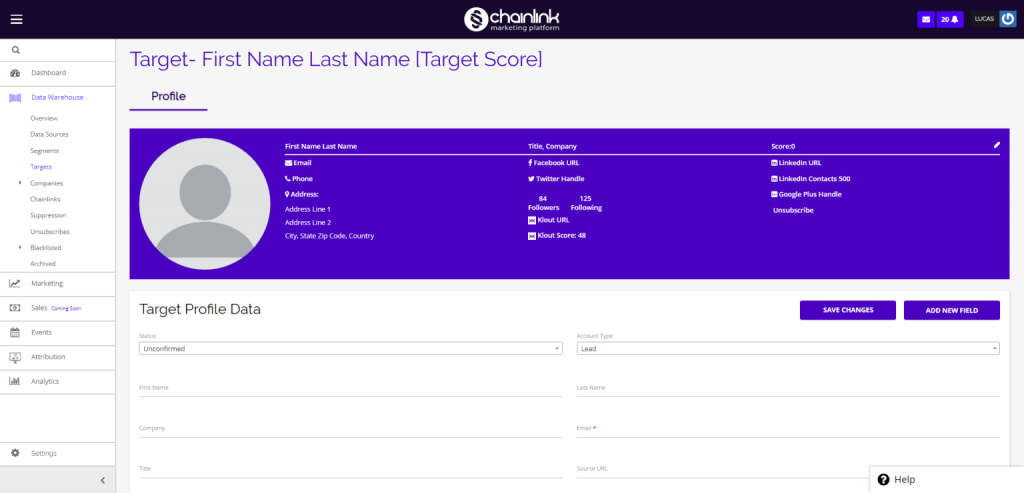
- If you would like to add an individual target to a Data Source, select the Create New button within the desired Data Source and you will be brought to a new page where you can enter the necessary information to create a Target.
- Be sure to fill out all of the required information and select Save Changes when finished to add your new Target to your desired Data Source.
- Note: Be sure to change the status to Confirmed. If the status is left as unconfirmed, the target will not be added to your data source.
Toggle Filters
- If you want to filter your Data Source by certain variables, select the Toggle Filters button.
- You will be able to filter your data source by a few different variables:
- Show Only Targets That:
- Did Open
- Did Click
- Did Not Open
- Did Not Click
- Specific Programs
- In The Last __
- Days
- Months
- Years
- Show Only Targets That:

2. Create a New Data Source
- To create a new data source, first click Create New in the top right corner of the dashboard.
- From here you will be brought to a new page where you can begin entering some general information and default settings for your new source.
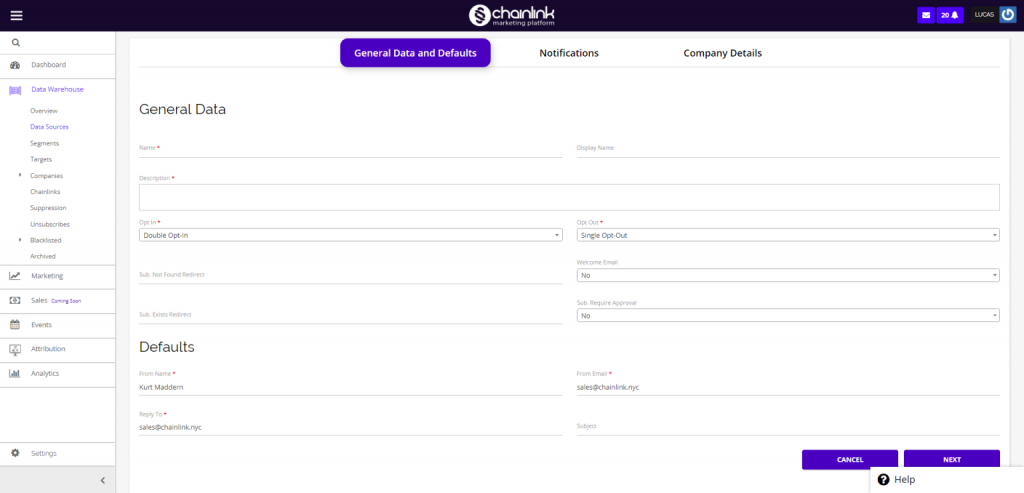
- When you are done filling out the general information, click Next and you will be brought to the notifications page.
- Note: Be sure to fill out all of the required fields before moving on.
- Next, you will be able to set up notifications for you new Data Source.
- Here you can enter information on where the subscribe and unsubscribe email notifications will be sent.
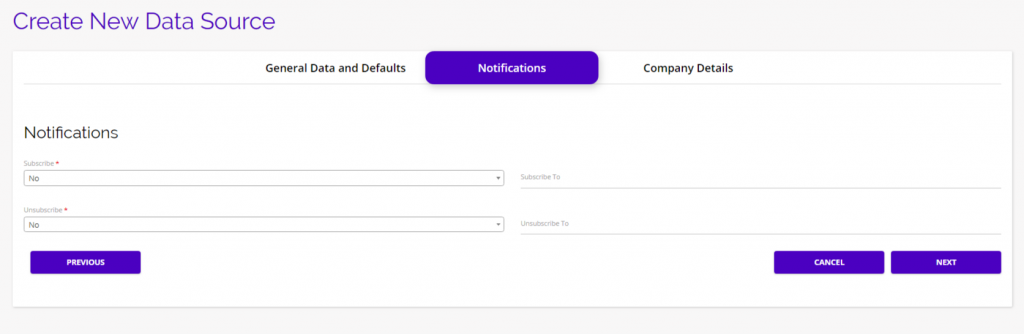
- When you finish entering the required information, select Next to continue to the final step for creating a new Data Source.
- You will then be brought to the final set up page where you can enter all of the company details.
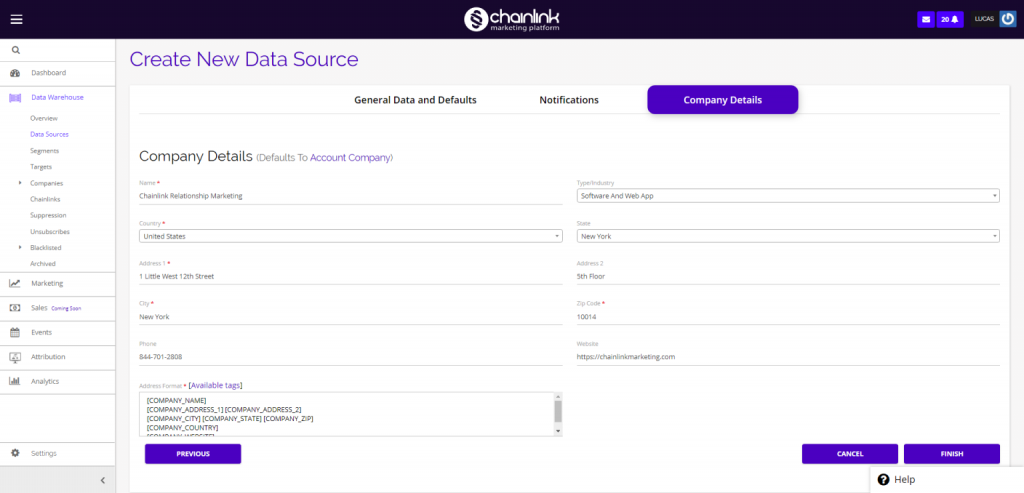
- When finished filling out the company details page, select Finish to complete the process and add your new Data Source to your Chainlink Marketing Platform account.
- You will be able to to find the new data source on the dashboard along with all of your other data sources.
3. Data Source Tools
- From the Data Source dashboard, you can use several tools to quickly manage a Data Source.
- You can import a list of Targets to add to a Data Source, export the Targets in a Data Source, and add an individual Target to a Data Source.
Import Targets
- Under the Tools column on the Data Sources dashboard, the button furthest to the left allows you to import a list of Targets to be added to a Data Source.

- After clicking the import button, you will be brought to this page where you can select the file that you want to import.

CSV Asynchronous
CVS asynchronous allows you to import a standard CSV file that will verify and upload in the background. This allows you to continue working in other parts of the platform while your targets are imported. CSV asynchronous is useful if you are uploading a large number of targets and don’t want to wait on the import page while your targets are uploaded. (You will receive an email notification when your upload is complete)
CSV Import FTP
CSV Import FTP is a good option if you want to keep your imported targets private through a protected FTP server.
CSV
The CSV option is the standard CSV file import. You will be able to see the import progress after you upload your file. (Use this option if you are importing a smaller amount of targets)
Text
The text option is useful if your target data is organizaed in a text file.
Database
Choose the Database option if your data is organized in a Sql database.
- Note: The imported files must be in the proper format. You should first do a test import (in a test list) and see if that goes as planned then do it for your actual list.
- Note: 20 MB is the maximum file size for an import.
- After selecting your file type, you will have to specify which fields you want to be imported from your file to the platform. (You can skip any fields that are on the original file, other than email)
- You will then be able to schedule a time for your data import or start the import immediately. If you start the import immediately, you will have to wait a few minutes before all of the data is uploaded.
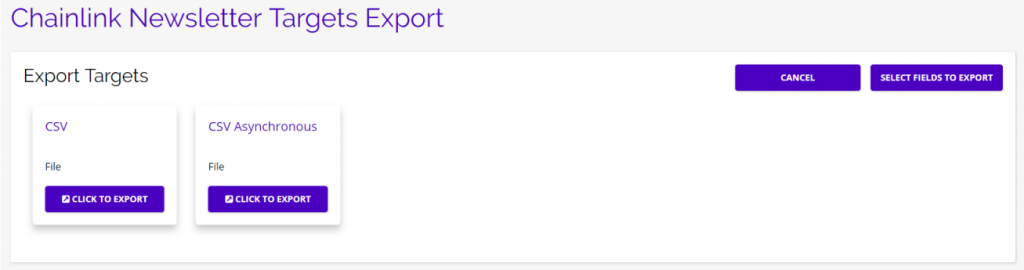
Export Targets
- The middle button in the Tools column is used to export a list of Targets from a Data Source.

- After clicking the export button, you will be brought to this page where you can select what type of file you want to export.
- Before clicking the export button, you can select the fields you want to be included in the export by clicking on the Select Fields To Export button.
- Drag & Drop the fields you want to include in the export to/from the Export Fields.
- The standard fields are First Name, Last Name, Company, Title, City, State, and Email.
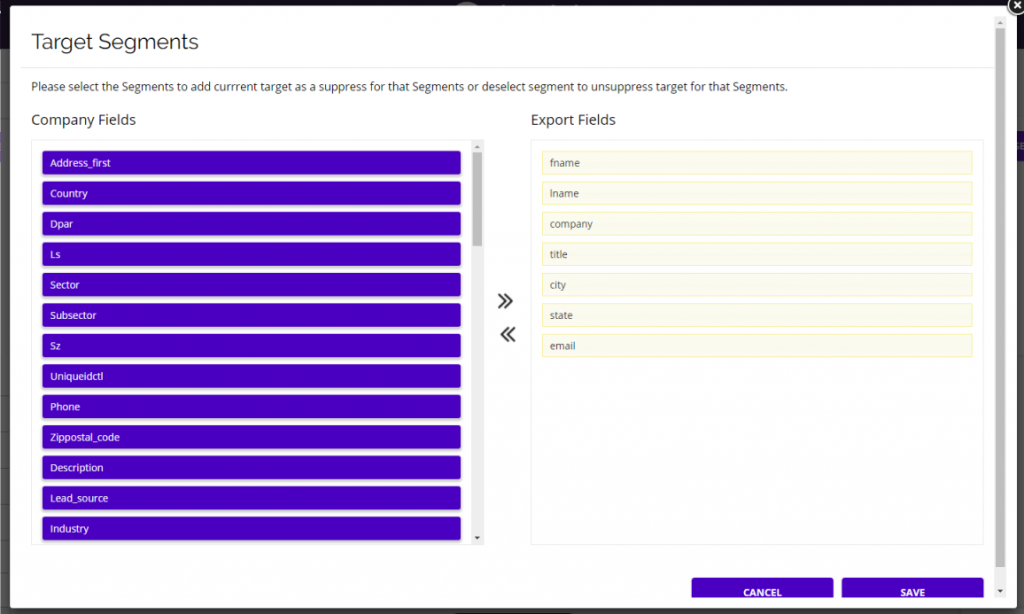
- Once you have selected which fields you want to include in your export, click Save and then select the Click To Export button for the file type you want.
- The download will then begin automatically.
Add Individual Target
- From the Data Sources dashboard, you also have the ability to add an individual Target to any Data Source in the platform.
- To do so, click on the + icon under the Tools column.

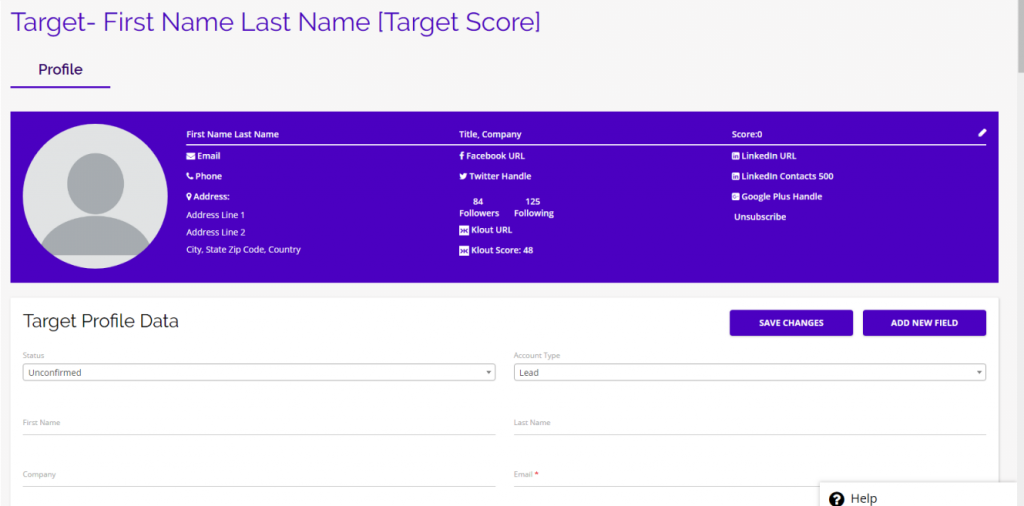
- You will be brought to a blank profile page where you can fill out all of the information for your new Target and add them directly to the Data Source you selected.
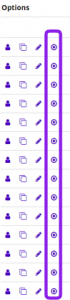
4. Options
- In the far right column of the Data Sources dashboard you will see a variety of options.
- From the Options column, you can easily view the Targets in a Data Source, Duplicate a Data Source, and Update or Delete a Data Source.
View Targets
- Click on the person icon under the options column to see a list of all of the Targets in that Data Source.
- This is the same action as clicking on the Name or Display Name of the Data Source you want to look at.
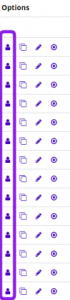
Copy Data Source
- To copy a Data Source, click on the duplicate icon and an exact copy of that Data Source will be added to your Data Sources dashboard.
- This might be useful if you plan to build off of an existing Data Source, but want to keep the original Data Source as is.
Update Data Source
- To update a Data Source’s information, click on the pencil icon and you will be brought to the page where you can edit the details of your Data Source.
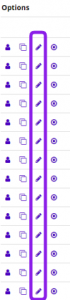
Delete Data Source
- To delete a Data Source, simply click the delete icon under the options column and the Data Source along with all of the Targets in that Data Source will be removed from the platform.
- There will be a confirmation message before you officially delete the Data Source from the platform to avoid any accidental deletions.
5. Data Sources Analytics
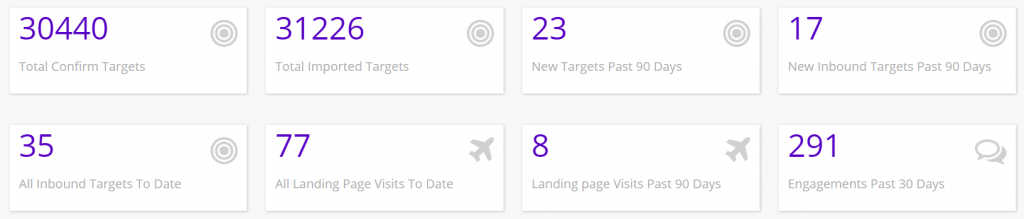
- Under the Target Lists and Data Sources, you will find a variety of useful reporting information and graphs based on your data sources.
- First, you will see the high-level statistics showing total targets, landing page visits, and engagements.
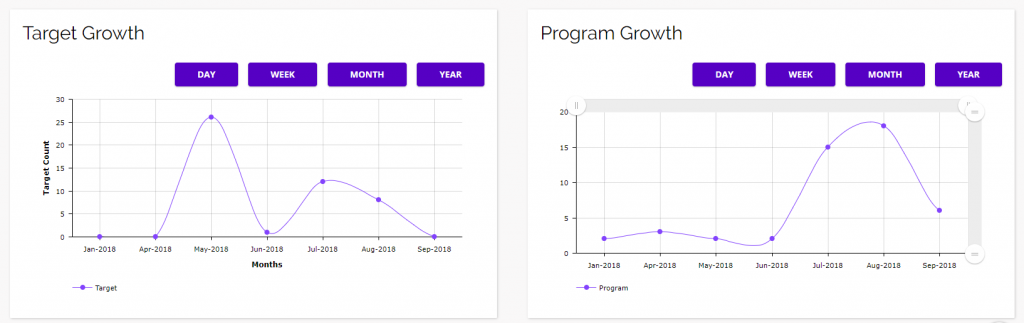
- Next, you will find two graphs showing your overall Target and Program growth.
- You can view both graphs by day, week, month, or year by using the buttons above the graphs.
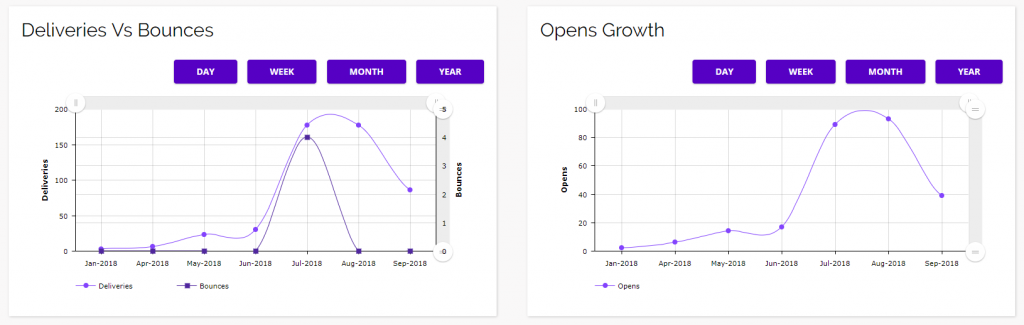
- The next set of graphs focus on your email performance: Deliveries vs. Bounces and Opens Growth.
- You can view both graphs by day, week, month, or year by using the buttons above the graphs.
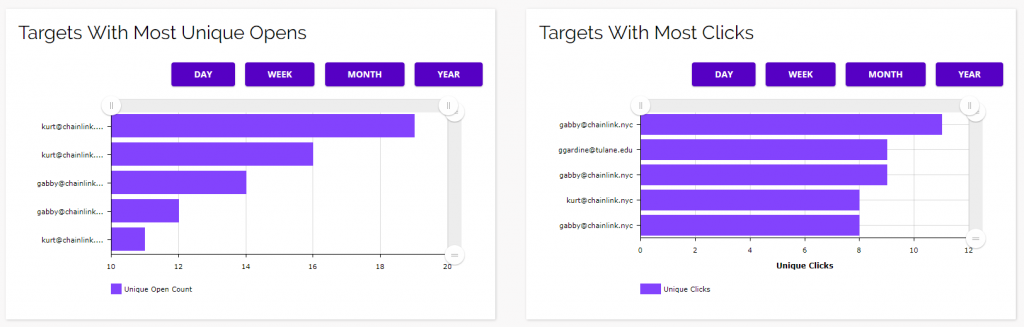
- The next two graphs show statistics related to your Targets’ performance: Targets With Most Unique Opens and Targets With Most Clicks.
- You can view both graphs by day, week, month, or year by using the buttons above the graphs.
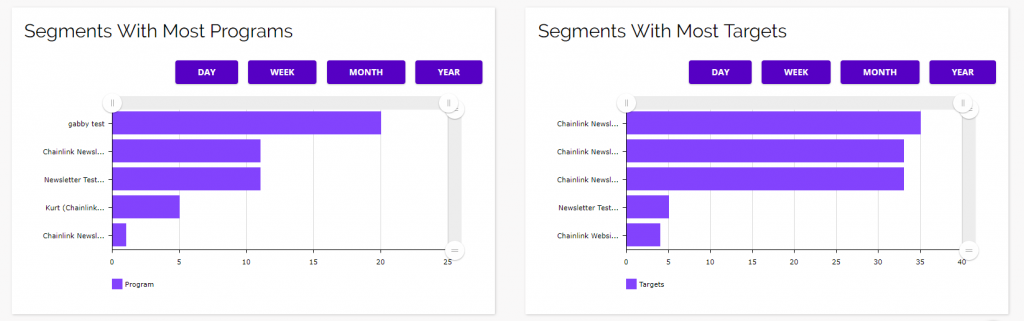
- The final pair of graphs show statistic related to your top segments: Segments With Most Programs and Segments With Most Targets.
- You can view both graphs by day, week, month, or year by using the buttons above the graphs.